[vsphere] FQDN 실습
FQDN
: Host 이름(www) + DNS 접미사(ex. naver.com)으로 이루어진 전체 도메인을 의미
- 사전 정보
· vSphere_server = 200.200.200.244
· Esxi server = 200.200.200.250
· 내부 네트워크 1 : 10.10.1.0/24
· 내부 네트워크 2 : 10.10.2.0/24 (내부 통신용)
· 내부 네트워크 3 : 10.10.3.0/24 (내부 통신용)
· 외부 네트워크 : 200.200.200.0/24 (default-gw : 200.200.200.254)
· DNS Server : 200.200.200.245
설치 방법
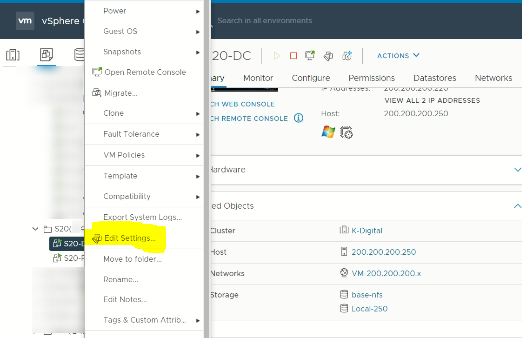
1. 가상머신 DC의 네트워크 변경
- 200.200.200.x와 연결되어 있던 DC의 네트워크를 표준 스위치의 Mgmt로 변경

2. DC의 IP 주소 변경
- 내부에서 통신을 하기 위해서는 DC의 IP 주소를 내부 네트워크 주소로 설정
⑴ 방법 1 : GUI 설정


내부 IP 주소로 변경
⑵ 방법 2 : CLI 설정 - Powershell
New-NetIPAddress –InterfaceAlias Ethernet0 –IPAddress 10.10.1.2 –PrefixLength 24 -DefaultGateway 10.10.1.1
// dc의 ip주소, 서브넷 마스크, 기본 게이트웨이 설정
Set-DnsClientServerAddress -InterfaceAlias Ethernet0 -ServerAddresses  127.0.0.1 //dns 서버 주소 설정

Set-DnsClientGlobalSetting -SuffixSearchList vclass.local //dns 접미사 설정

Rename-computer -Newname dc  -restart //Net-bios 이름 dc로 설정
설정 완료
· 127.0.0.1(루프백 주소) : DNS 서버 주소를 자신으로 하여 자신의 DNS 서버를 이용하여 사용자에게 DNS에 해당하는 IP 주소를 알려준다.
· -SuffixSearchList DNS 접미사 : FQDN(전체주소)가 아니더라도 접미사만 입력하여 nslookup을 통해 서버 주소 찾을 수 있게 설정
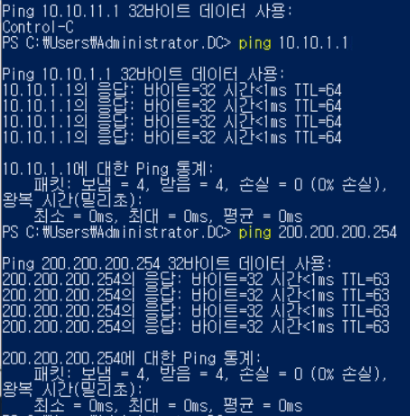
3. 네트워크 연결 확인
네트워크가 제대로 연결되어 있는지 사전에 확인 후 진행 필수
4. DC - AD 설치(DNS 서버 포함)
(1) CLI - Powershell
- AD 역할 서비스 추가 및 Host DC로 승격
// https://docs.microsoft.com/en-us/powershell/module/servermanager/install-windowsfeature?view=winserver2012r2-ps&viewFallbackFrom=windowsserver2019-ps

// AD 역할 서비스 추가
Get-WindowsFeature | findstr Active

install-windowsfeature

Install-WindowsFeature -Name AD-Domain-Services -IncludeManagementTools //AD설치

// Host DC 승격
Import-Module ADDSDeployment

Install-ADDSForest `
-CreateDnsDelegation:$false `
-DatabasePath "C:\Windows\NTDS" `
-DomainMode "WinThreshold" `
-DomainName "vclass.local" `
-DomainNetbiosName "VCLASS" `
-ForestMode "WinThreshold" `
-InstallDns:$true `
-LogPath "C:\Windows\NTDS" `
-NoRebootOnCompletion:$false `
-SysvolPath "C:\Windows\SYSVOL" `
-Force:$true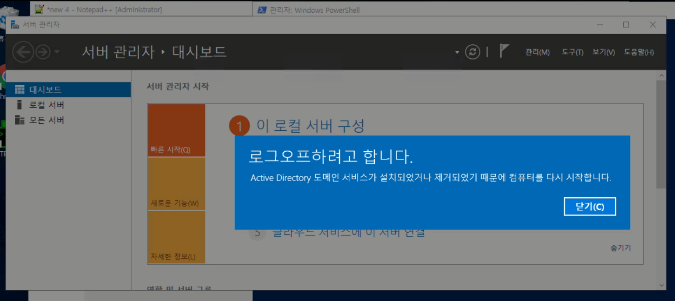
- DNS 설정
dnsmgmt.msc //dns 설정
Add-DnsServerForwarder -IPAddress 200.200.200.245 -PassThru //dc 전달자 생성
## Add-DnsServerPrimaryZone -Name "vclass.local" -ZoneFile “vclass.local.dns”
# 역방향 조회 도메인 만들기
Add-DnsServerPrimaryZone -NetworkID 10.10.1.0/24 -ZoneFile "1.10.10.in-addr.arpa.dns" //역방향 영역 파일 생성
# Domain Controller Record
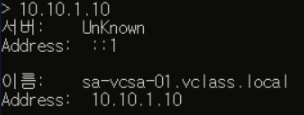
Add-DnsServerResourceRecordA -Name "sa-vcsa-01" -ZoneName "vclass.local" -IPv4Address "10.10.1.10" //정방향 호스트 추가
Add-DnsServerResourceRecordPtr -Name "10" -ZoneName "1.10.10.in-addr.arpa" -PtrDomainName "sa-vcsa-01.vclass.local" //역방향 호스트 추가
Add-DnsServerResourceRecordA -Name "sa-esxi-01" -ZoneName "vclass.local" -IPv4Address "10.10.1.11"
Add-DnsServerResourceRecordPtr -Name "11" -ZoneName "1.10.10.in-addr.arpa" -PtrDomainName "sa-esxi-01.vclass.local"
Add-DnsServerResourceRecordA -Name "sa-esxi-02" -ZoneName "vclass.local" -IPv4Address "10.10.1.12"
Add-DnsServerResourceRecordPtr -Name "12" -ZoneName "1.10.10.in-addr.arpa" -PtrDomainName "sa-esxi-02.vclass.local"
Add-DnsServerResourceRecordA -Name "sa-esxi-03" -ZoneName "vclass.local" -IPv4Address "10.10.1.13"
Add-DnsServerResourceRecordPtr -Name "13" -ZoneName "1.10.10.in-addr.arpa" -PtrDom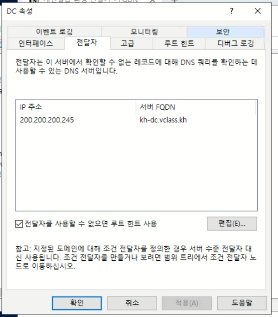
dns 전달자
+) DNS 전달자
현재 DNS 서버에 찾는 도메인명이 없을 경우 전달자를 사용하여 다른 DNS 서버에서 찾아 알려달라는 의미
- 정방향, 역방향 도메인 생성 확인
dnsmgmt.msc
esxi-01,02,03, vcsa-01이 생성된 결과 확인 가능
5. FQDN 생성 확인
// cmd 창 nslookup- 정방향 확인

- 역방향 확인
- 전달자 확인

구성 완료 가능하다.